public static void main(String[] args) throws IOException {
    String result = new String(Files.readAllBytes(Paths.get("/tmp/result.txt")));
}
public static void main(String[] args) throws IOException {
String result = new String(Files.readAllBytes(Paths.get("/tmp/result.txt")));
}
Has been a while, I was thinking to blog this out but “lazy” bugs keep biting me 🙁 so I didn’t manage to do it. Until yesterday, I was looking for some related info but I hardly recall what I did previously. Phew… so decided to jot down here.
Typically software application should at least perform 2 types of automate tests which are unit test and integration test. For me… the distinction between these two are pretty straight forward:
| Unit Test | Integration Test |
| Test on smallest unit of application such as method / function | Test on combination of few units in application to prove they run nicely with external resource (if there is any) |
| Cheap to run, fast to run (normally less than a minute) | Slower compared with unit test (normally few minutes or more) |
| NOT depends on external resources such as database, third party services, disk access | Normally involve database, disk access, other services |
| Mock the input of unit test if necessary | Use the real service / resource |
| Maven Plugin Usage | |
| Class name normally suffix with “Test”, for eg: TaxCalculatorTest (Maven Surefire plugin automatically include these wildcard patterns) | Class name normally suffix with “IT”, for eg: TaxCalculationServiceIT (Maven Failsafe plugin automatically include these wildcard patterns) |
| Using Maven Surefire Plugin | Using Maven Failsafe Plugin |
| Run during “test” phase in default Maven lifecycle | Run during “integration-test” phase in default Maven lifecycle |
Minimal sample Maven configuration:
<plugin>
	<groupId>org.apache.maven.plugins</groupId>
	<artifactId>maven-surefire-plugin</artifactId>
	<version>${maven.surefire.version}</version>
	<executions>
		<execution>
			<id>default-test</id>
			<goals>
				<goal>test</goal>
			</goals>
		</execution>
	</executions>
</plugin>
|
Minimal sample Maven configuration:
<plugin>
	<groupId>org.apache.maven.plugins</groupId>
	<artifactId>maven-failsafe-plugin</artifactId>
	<version>${maven.failsafe.version}</version>
	<executions>
		<execution>
			<id>default-integration-test</id>
			<goals>
				<goal>integration-test</goal>
			</goals>
		</execution>
	</executions>
</plugin>
|
Command to execute:
mvn test |
Command to execute:
mvn integration-test |
| Report generated in <PROJECT>/target/surefire-reports | Report generated in <PROJECT>/target/failsafe-reports |
By viewing the status report generated by surefire & failsafe plugin doesn’t create much insight, but we can make use of Jacoco plugin to create code coverage report as below.
 Here are minimal sample Maven configuration for Jacoco:
<plugin>
	<groupId>org.jacoco</groupId>
	<artifactId>jacoco-maven-plugin</artifactId>
	<version>${jacoco.version}</version>
	<executions>
		<execution>
			<id>default-prepare-agent</id>
			<goals>
				<goal>prepare-agent</goal>
			</goals>
		</execution>
		<execution>
			<id>default-prepare-agent-integration</id>
			<goals>
				<goal>prepare-agent-integration</goal>
			</goals>
		</execution>
		<execution>
			<id>default-report</id>
			<goals>
				<goal>report</goal>
			</goals>
		</execution>
		<execution>
			<id>default-report-integration</id>
			<goals>
				<goal>report-integration</goal>
			</goals>
		</execution>
	</executions>
</plugin>
Jacoco coverage reports generated at <PROJECT>/target/site/* when we run mvn verify (bind to maven verify phase). To view the coverage reports, simply open <PROJECT>/target/site/jacoco/index.html with browser.
Yay ! we have now cover first part of test (automate unit + integration test), and if you notice, we done all steps manually (run maven command, open report from target folder) just to get the report display.
Moreover, we just able to view the coverage report locally, how if we want to share with other team members or to make it public accessible.
And…….. How can we automate the whole process ?
Da.. Dang !! We have Jenkins (Continuous Integration) + SonarQube (Continuous Code Quality Inspection) to help us 🙂
Setting up Jenkins is pretty straight forward, just follow steps from Jenkins Guided Tour or Installing Jenkins. We should able to see something as below if Jenkins setup successfully and launch in browser.
 Let’s continue with SonarQube setup by following “Get Started in Two Minutes” guide from it’s official site. And if nothing goes wrong, we should able to bring up SonarQube console via browser as below:
 Until this stage, you might feel a little tired or sleepy, it’s okie to refresh yourself with a cup of coffee 🙂
To allow Jenkins to work with SonarQube, we might need a little setup as below.


 Note: Sample analysis parameter added above are very minimal, refer Analysis Parameter or Code Coverage by Unit Tests for Java Project for more parameter available.
Some call it hot deploy, some refer to runtime class reload/redefine, but whatsoever….
It is just mechanism to reload compiled class file during jvm runtime, to avoid ordinary java development life cycle of “code change -> build -> deploy”, which will significantly save lot’s of wait time (especially when you have multiple modules dependency project).
Both open source project: HotSwapAgent and Spring-Loaded works pretty well for me, but if you are looking for commercial product, JRebel will be the choice.
Hit into this error when tying to get the “Content-Disposition” header using XMLHttpRequest.
Refused to get unsafe header "Content-Disposition"
Finally found the solution is to include CORS access control headers in HTTP response….
httpResponse.addHeader("Access-Control-Expose-Headers", "Content-Disposition");
Take note that it’s not Access-Control-Allow-Headers but Access-Control-Expose-Headers
Credit to this stackoverflow post.
Just finished Test-Driven Java Development (but will take longer time to digest), and notice there are few tools/framework worth to share.
Test Driven Development Framework
| Unit Test | Code Coverage | Mocking |
| JUnit | JaCoCo (Java Code Coverage)) | Mockito |
| TestNG | EasyMock | |
| Hamcrest | PowerMock | |
| AssertJ |
Behavior Driven Development Framework
| Web Testing |
RESTful API Testing |
| Selenide | REST Assured |
| JBehave | |
| Cucumber |
Overall this is quite a good book if you practice TDD, as it include bunch of hands on tutorial. Personally I think practicing TDD is good if we have solid requirement (or at least not changing every few days), else we will waste a lot of time just to maintain unit test for immature requirement 🙂
Accidentally found this util class while reading an ebook, and think it worth sharing since myself always found this a tedious code especially prefix and suffix the string.
We used to construct CSV string as below:
StringBuilder nameCsv = new StringBuilder();
nameCsv.append("Maria").append(",");
nameCsv.append("Ken").append(",");
nameCsv.append("Collin");
System.out.println(nameCsv.toString());
//OUTPUT: Maria,Ken,Collin
With new StringJoiner util in Java 1.8, we can do it in a cleaner way.
StringJoiner nameCsv = new StringJoiner(",");
nameCsv.add("Maria");
nameCsv.add("Ken");
nameCsv.add("Collin");
System.out.println(nameCsv.toString());
//OUTPUT: Maria,Ken,Collin
The constructor also allow us to prefix and suffix the string.
StringJoiner nameCsv = new StringJoiner(",", "{", "}");
nameCsv.add("Maria");
nameCsv.add("Ken");
nameCsv.add("Collin");
System.out.println(nameCsv.toString());
//OUTPUT: {Maria,Ken,Collin}
If you are having custom servlet filter added into Spring security filter chain, and you are expecting custom filter exception throws should translate by ExceptionTranslationFilter but it doesn’t. Then you probably need to register your custom filter after ExceptionTranslationFilter as below.
protected void configure(HttpSecurity http) throws Exception {
        http.addFilterAfter(new YOUR_CUSTOM_SERVLET_FILTER(), ExceptionTranslationFilter.class);
    }
Recently I’m working on my personal project which expose RESTful API for client communication. In order to restrict some access to authenticated user only, It will then require client to login and issue a token upon login (also referring to Authentication token in this post), then client will use the token to identify them self for subsequent request.
Since I’m using Spring MVC framework for the implementation, @RequestHeader annotation come in handy. Just grab the header, set as parameter then call the business implementation for further processing. Sounds pretty easy ya 🙂
But when more and more method require this token, this become tedious where you keep adding @RequestHeader into your controller method just to get the token. So I decided to make use of filter for this.
After reading online documentation and article, I have created the scaffolding code @ github, which will do the following:
1. Get the “Authentication” header from each request.
2. Parse the header to get the token and query user based on the token.
3. Set the authenticated user object into SecurityContextHolder, and get back same user object anywhere within the request thread execution time. (By default the SecurityContextHolder uses a ThreadLocal to store details)
4. Each request will then check for role validity to access the business method.
Feel free to check out the code for study and fork it for your own usage, yet most important…………… have fun 🙂
Knowing SecurityContextHolder using ThreadLocal to store user related information. Meaning it does not use HttpSession due to some security concern (not discuss here). Wrote a main method to test that out.
public class NormalThreadExample {

    public class MyThread implements Runnable {

        private Integer normalInteger;

        @Override
        public void run() {
            try {
                Integer randomInt = (int) (Math.random() * 999);
                System.out.println(Thread.currentThread().getName() + " SET " + randomInt);
                normalInteger = randomInt;
                Thread.sleep(2000);
                System.out.println(Thread.currentThread().getName() + " GET " + normalInteger);

            } catch (InterruptedException ex) {
                // SOME HANDLER
            }
        }
    }

    public void haveFun() throws InterruptedException{
        MyThread myThread = new MyThread();
        Thread thread1 = new Thread(myThread);
        Thread thread2 = new Thread(myThread);
        thread1.start();
        thread2.start();

    }

    public static void main(String[] args) throws InterruptedException {
        NormalThreadExample example = new NormalThreadExample();
        example.haveFun();
    }
}
//Output :
Thread-0 SET 737
Thread-1 SET 404
Thread-1 GET 404
Thread-0 GET 404
public class ThreadLocalExample {

    public class MyThread implements Runnable {

        private ThreadLocal<Integer> threadLocalInteger = new ThreadLocal<>();

        @Override
        public void run() {
            try {
                Integer randomInt = (int) (Math.random() * 999);
                System.out.println(Thread.currentThread().getName() + " SET " + randomInt);
                threadLocalInteger.set(randomInt);
                Thread.sleep(2000);
                System.out.println(Thread.currentThread().getName() + " GET " + threadLocalInteger.get());
            } catch (InterruptedException ex) {
                // SOME HANDLER
            }
        }
    }

    public void haveFun() throws InterruptedException{
        MyThread myThread = new MyThread();
        Thread thread1 = new Thread(myThread);
        Thread thread2 = new Thread(myThread);
        thread1.start();
        thread2.start();
    }

    public static void main(String[] args) throws InterruptedException {
        ThreadLocalExample example = new ThreadLocalExample();
        example.haveFun();
    }
}
//Output
Thread-0 SET 3
Thread-1 SET 860
Thread-1 GET 860
Thread-0 GET 3
Note: Output result may be vary since it’s using random generator.
Almost a decade using NetBeans as my primary development IDE, I was always fell that NetBeans is lag behind IntelliJ especially their elegant Darcula theme which I like the most and some features offered is very responsive.
Anyway, I did not continue using it because the ultimate version is a bit pricy for me, and using the feature limited community edition make me feel like owning a jet aircraft but limited jet fuel.
So… download the latest NetBeans 8.1 and did some customization…
Da… Dang…. here is my new look and feel of NetBeans.
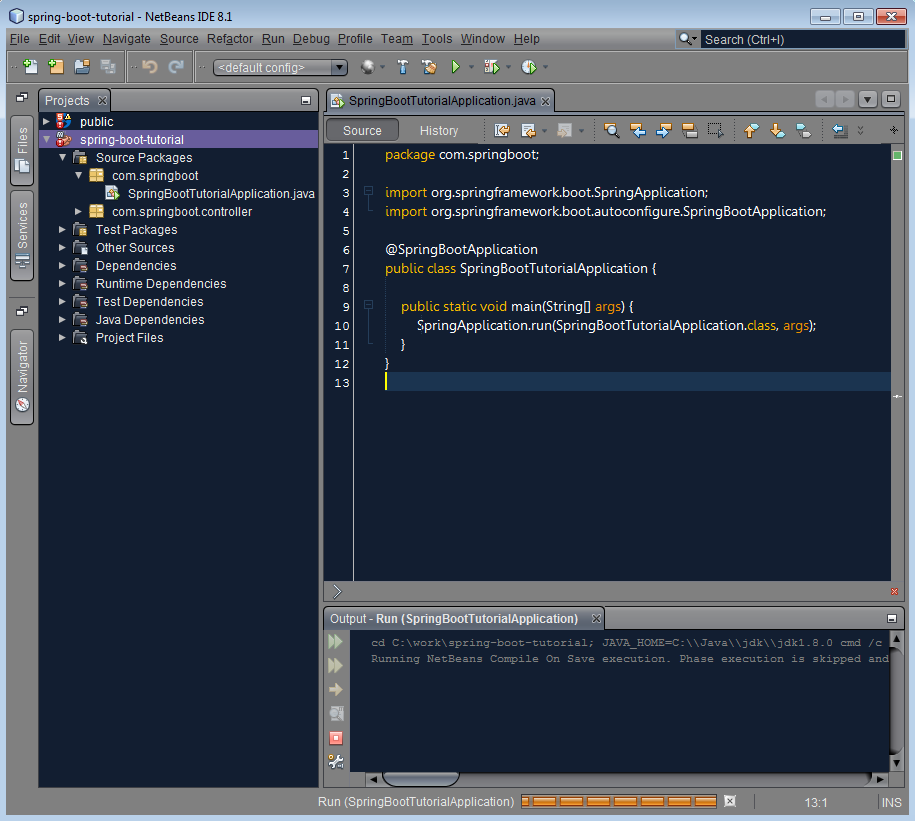
Anyway, the dark theme is not new, but I just realize using it with some other font and theme can be nice too 🙂
Besides that, the IDE now have better support for Html5/Javascript and AngularJS works much better than before (full release note here)
Here are my customization to share:

<entry javaType="java.lang.Float" name="line-height-correction" xml:space="preserve">
    <value><![CDATA[1.1]]></value>
</entry>