Not only Apple… But philosophy we can learn from him and apply in our life…
Not only Apple… But philosophy we can learn from him and apply in our life…
Facing an issue where the email scheduler job keep sending duplicate activation email to user after they registered to the system.
After some troubleshooting time, found the culprit was actually spring schedule job running separately in separate node under cluster environment.
I then decide to “borrow” the idea from Liquibase on how it ensure only one instance running the changeset at one time. I first create a table call schedule_lock with column below:
CREATE TABLE scheduler_lock
(
  id integer NOT NULL,
  job_type character varying(50),
  is_lock boolean,
  lock_time timestamp without time zone,
  lock_by character varying(255),
  CONSTRAINT pk_scheduler_lock PRIMARY KEY (id)
)
By having the job_type column, we can store different schedule job status in single table. lock_time and lock_by simply store the lock time and host name for easy debugging later. So the idea behind is pretty simple, any job will need to check against the lock status and their job type before running the job.
For eg: Node A run the job, it own the lock by updating is_lock to TRUE, lock_time and lock_by to current time and host name. Now Node B kicks in with the same job, it then check against the column, found is_lock = TRUE, it know some node already performing the job, so it can have some rest time by discard it’s own job.
After Node A complete it’s job, it will then release the lock by updating is_lock to FALSE, lock_time and lock_by to null.
And here is the code snippet for getting and releasing the lock.
public boolean getLock(SchedulerJobType jobType, String author) {
        log.debug("[{}] getting the lock", author);
        Session session = sessionFactory.getCurrentSession();
        Criteria criteria = session.createCriteria(SchedulerLock.class);
        criteria.add(eq("jobType", jobType.getCode()));
        SchedulerLock scheduleLock = (SchedulerLock) criteria.uniqueResult();

        if (scheduleLock.getIsLock().equals(Boolean.FALSE)) {
            scheduleLock.setLock(Boolean.TRUE);
            scheduleLock.setLockBy(author);
            scheduleLock.setLockTime(new Date());
            session.update(scheduleLock);
            log.debug("[{}] got the lock", author);
            return true;
        }
        return false;
    }
public void releaseLock(SchedulerJobType jobType, String author) {
        log.debug("[{}] releasing the lock", author);
        Session session = sessionFactory.getCurrentSession();
        Criteria criteria = session.createCriteria(SchedulerLock.class);
        criteria.add(eq("jobType", jobType.getCode()));
        criteria.add(eq("lockBy", author));

        try {
            SchedulerLock scheduleLock = (SchedulerLock) criteria.uniqueResult();
            if (scheduleLock.getIsLock().equals(Boolean.TRUE)) {
                scheduleLock.setLock(Boolean.FALSE);
                scheduleLock.setLockBy(null);
                scheduleLock.setLockTime(null);
                session.update(scheduleLock);
                log.debug("[{}] released the lock", author);
            }

        } catch (HibernateException e) {
            log.debug("Not able to release lock by current thread {} due to {}", author, e.getCause());
        }
    }
OK, seems everything is now in place and my spring scheduler is “cluster safe”, Yay !
BUT … when the job run again with this new implementation, some weird behavior again happen.
Node A and Node B got the lock one after another, Node A release the lock successfully, but Node B throw an exception when releasing the lock. Logs below explain the situation:
#Node A
2016-02-02 03:12:00,000 DEBUG EmailServiceImpl: Email scheduler job started...
2016-02-02 03:12:00,013 DEBUG SchedulerLockDAOImpl: [Node-A] getting the lock
2016-02-02 03:12:00,022 DEBUG SchedulerLockDAOImpl: [Node-A] got the lock
.....
2016-02-02 03:12:06,199 DEBUG SchedulerLockDAOImpl: [Node-A] releasing the lock
2016-02-02 03:12:06,204 DEBUG SchedulerLockDAOImpl: [Node-A] released the lock
2016-02-02 03:12:06,210 DEBUG EmailServiceImpl: Email scheduler job end successfully...
#Node B
2016-02-02 03:12:00,000 DEBUG EmailServiceImpl: Email scheduler job started...
2016-02-02 03:12:00,013 DEBUG SchedulerLockDAOImpl: [Node-B] getting the lock
2016-02-02 03:12:00,019 DEBUG SchedulerLockDAOImpl: [Node-B] got the lock
.....
2016-02-02 03:12:05,082 DEBUG SchedulerLockDAOImpl: [Node-B] releasing the lock
2016-02-02 03:12:05,102 ERROR TaskUtils$LoggingErrorHandler: Unexpected error occurred in scheduled task.
Lets zoom into the code and see what is happening.
if (scheduleLock.getIsLock().equals(Boolean.FALSE)) {
    scheduleLock.setLock(Boolean.TRUE);  //<-- Node A
    scheduleLock.setLockBy(author);
    scheduleLock.setLockTime(new Date());
    session.update(scheduleLock);        //<-- Node B
    log.debug("[{}] got the lock", author);
    return true;
}
In this situation, the only possibility I can think of is Node B run the job first and got the lock by updating the record into database, but before Node B commit the changes into database, Node A kicks in safely with lock status still FALSE, so it then overwrite the lock status updated by Node B just almost immediately.
After some thought, I come out with an idea to make them run in different time by setting random Thread sleep time for each of the job and guess what, problem solved 🙂
@Scheduled(cron = "0 0 */2 * * ?")
public void sendActivationEmailTask() {

    try {
        int sleepPeriod = ThreadLocalRandom.current().nextInt(3, 60);
        Thread.sleep(sleepPeriod * 1000);
        String author = InetAddress.getLocalHost().getHostName();
        if (schedulerLockDAO.getLock(SchedulerJobType.EMAIL, author)) {
            // GET THE RECORD AND SEND EMAIL
            schedulerLockDAO.releaseLock(SchedulerJobType.EMAIL, author);
        }

    } catch (Exception e) {
        // LOG EXCEPTION
    }
}
p/s: This might not be the best way, as the scheduler job will not run in exact 2 minutes we set, in this case will be 2 minutes + Thread sleep time from 1 – 60 sec. Leave me a comment if you have better idea.
Facebook will allow us to change our fan page username only once after we create, and we will need at least 25 likes to reset the username subsequently.
So what if you have already used up the first chance, and you don’t have 25 fans yet to change the new username?
Here is the tricks which you can by pass it:
1. Create new facebook account, then create a new fan page from the new account.
2. Goto https://www.facebook.com/username/ to create your new fan page username.
3. Goto Page Settings –> Page Roles then specify an email address (your real facebook login email) to be the page admin, then click Save to apply.

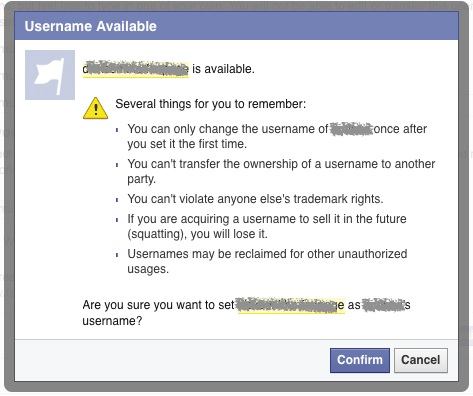
4. And you will see this.

5. You will receive an email as below after few second, just confirm and proceed to login if needed.

6. All set, you can now start managing the new fan page with new username. Follow step here to delete your temporary facebook account if you no longer using it, since this temporary account is also an admin for the fan page, so people who login using this account will be able to delete the fan page 🙂
If you are having custom servlet filter added into Spring security filter chain, and you are expecting custom filter exception throws should translate by ExceptionTranslationFilter but it doesn’t. Then you probably need to register your custom filter after ExceptionTranslationFilter as below.
protected void configure(HttpSecurity http) throws Exception {
        http.addFilterAfter(new YOUR_CUSTOM_SERVLET_FILTER(), ExceptionTranslationFilter.class);
    }
The idea behind storj is simple yet very promising.
We can now enjoy cheaper cloud storage, at the same time make some penny from our idle disk space. Actually if we notice consumer technology trend, consumer now days enjoy making penny by using technology with minimize effort. Uber, Airbnb are very successful use cases.
Hmm.. I foresee we can also sell our idle cpu computation power in the near future 🙂
Recently I’m working on my personal project which expose RESTful API for client communication. In order to restrict some access to authenticated user only, It will then require client to login and issue a token upon login (also referring to Authentication token in this post), then client will use the token to identify them self for subsequent request.
Since I’m using Spring MVC framework for the implementation, @RequestHeader annotation come in handy. Just grab the header, set as parameter then call the business implementation for further processing. Sounds pretty easy ya 🙂
But when more and more method require this token, this become tedious where you keep adding @RequestHeader into your controller method just to get the token. So I decided to make use of filter for this.
After reading online documentation and article, I have created the scaffolding code @ github, which will do the following:
1. Get the “Authentication” header from each request.
2. Parse the header to get the token and query user based on the token.
3. Set the authenticated user object into SecurityContextHolder, and get back same user object anywhere within the request thread execution time. (By default the SecurityContextHolder uses a ThreadLocal to store details)
4. Each request will then check for role validity to access the business method.
Feel free to check out the code for study and fork it for your own usage, yet most important…………… have fun 🙂
Knowing SecurityContextHolder using ThreadLocal to store user related information. Meaning it does not use HttpSession due to some security concern (not discuss here). Wrote a main method to test that out.
public class NormalThreadExample {

    public class MyThread implements Runnable {

        private Integer normalInteger;

        @Override
        public void run() {
            try {
                Integer randomInt = (int) (Math.random() * 999);
                System.out.println(Thread.currentThread().getName() + " SET " + randomInt);
                normalInteger = randomInt;
                Thread.sleep(2000);
                System.out.println(Thread.currentThread().getName() + " GET " + normalInteger);

            } catch (InterruptedException ex) {
                // SOME HANDLER
            }
        }
    }

    public void haveFun() throws InterruptedException{
        MyThread myThread = new MyThread();
        Thread thread1 = new Thread(myThread);
        Thread thread2 = new Thread(myThread);
        thread1.start();
        thread2.start();

    }

    public static void main(String[] args) throws InterruptedException {
        NormalThreadExample example = new NormalThreadExample();
        example.haveFun();
    }
}
//Output :
Thread-0 SET 737
Thread-1 SET 404
Thread-1 GET 404
Thread-0 GET 404
public class ThreadLocalExample {

    public class MyThread implements Runnable {

        private ThreadLocal<Integer> threadLocalInteger = new ThreadLocal<>();

        @Override
        public void run() {
            try {
                Integer randomInt = (int) (Math.random() * 999);
                System.out.println(Thread.currentThread().getName() + " SET " + randomInt);
                threadLocalInteger.set(randomInt);
                Thread.sleep(2000);
                System.out.println(Thread.currentThread().getName() + " GET " + threadLocalInteger.get());
            } catch (InterruptedException ex) {
                // SOME HANDLER
            }
        }
    }

    public void haveFun() throws InterruptedException{
        MyThread myThread = new MyThread();
        Thread thread1 = new Thread(myThread);
        Thread thread2 = new Thread(myThread);
        thread1.start();
        thread2.start();
    }

    public static void main(String[] args) throws InterruptedException {
        ThreadLocalExample example = new ThreadLocalExample();
        example.haveFun();
    }
}
//Output
Thread-0 SET 3
Thread-1 SET 860
Thread-1 GET 860
Thread-0 GET 3
Note: Output result may be vary since it’s using random generator.
Let’s see what we buzz the most in year 2015 before we start our new chapter for the year of 2016 🙂
It’s kinda sad when “being together while not being together”.
We are living in the world full of live creature, but we choose to behave like robots.
Hmm…. It’s time to change…..
LET’S TALK MORE !